This introduction is the same as for most of the other options and can be skipped if you are familiar with the gear.
If you wish you can let the simulation work right through the grouting of the hole without you being required to do any thinking! But, instead if you wish, you can do it by yourself .

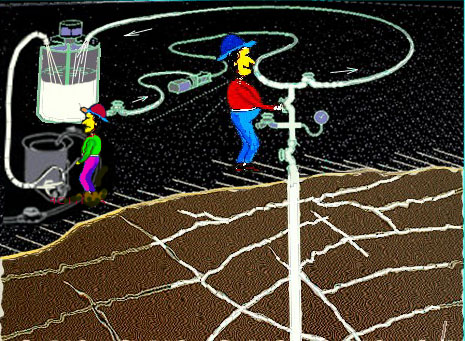
This is a simple layout of the grouting equipment. The grout is mixed in the mixer at left, and then sent to the agitator, from which a pump is used to pump it along the circulation line to the grout hole. Grout not used there is pumped back to the agitator. .
In this sketch the grouting has progressed to the stage where the cracks have been partly filled with grout, but you will, of course, be starting with a fresh hole.
In the simulation the gear on the surface is not shown in further sketches. For explanations of the terminology
and criteria used consult the accompanying programmes and the Guide.
And now we come to running the
simulation. The pretend grout hole is 20 feet deep [6 metres, say] throughout the simulation and is vertical.
The grout does not contain additives.
Assume that the cracking system reached by this hole has the following properties:
1. The water test before grouting gave a lugeon value in the 'high' range. This range might be
regarded as a test result above 25to40 lugeons - frequently greater than 100 lugeons. Let us pick such a site,
where we are dealing with greater than 100 lugeons. The actual test result could be several hundred lugeons,
but, as recommended in the Guide, such results are rounded back to "greater than 100". Geologically, the
foundation would display obvious large open cracks.
2. Cracks are generally wider than about 0.050 inches [1.25mm] open, and are sufficient to
provide easy travel for the grout through the cracking system.
The hole would probably accept the grout as fast as it could be supplied, without building up any pressure. The starting mix should be a thick one such as 0.8:1.
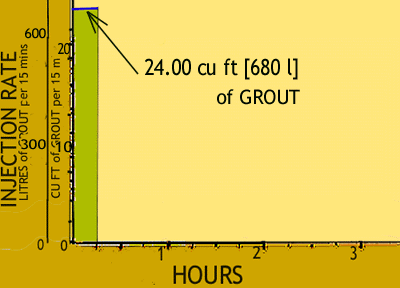
In the first 15 minutes assume that the grout taken down the hole is 24.00 cu ft [680 litres]. This is a very large take. The graph shows this, using the same format as for the other options, but condensed to fit here.

At the end of the first 15 minutes on actual grouting job checks should be made to make sure that everything is going right. In particular, this high take could indicate leaks, connections, or rock movement taking place. However, assume that none of these happen and that the grouting proceeds smoothly.
It is necessary to decide what to do next. The choice is from one of the following: